How it Works » Product Screenshots
Launch OST to PST Converter Tool and click on “Add File" button to add the file.
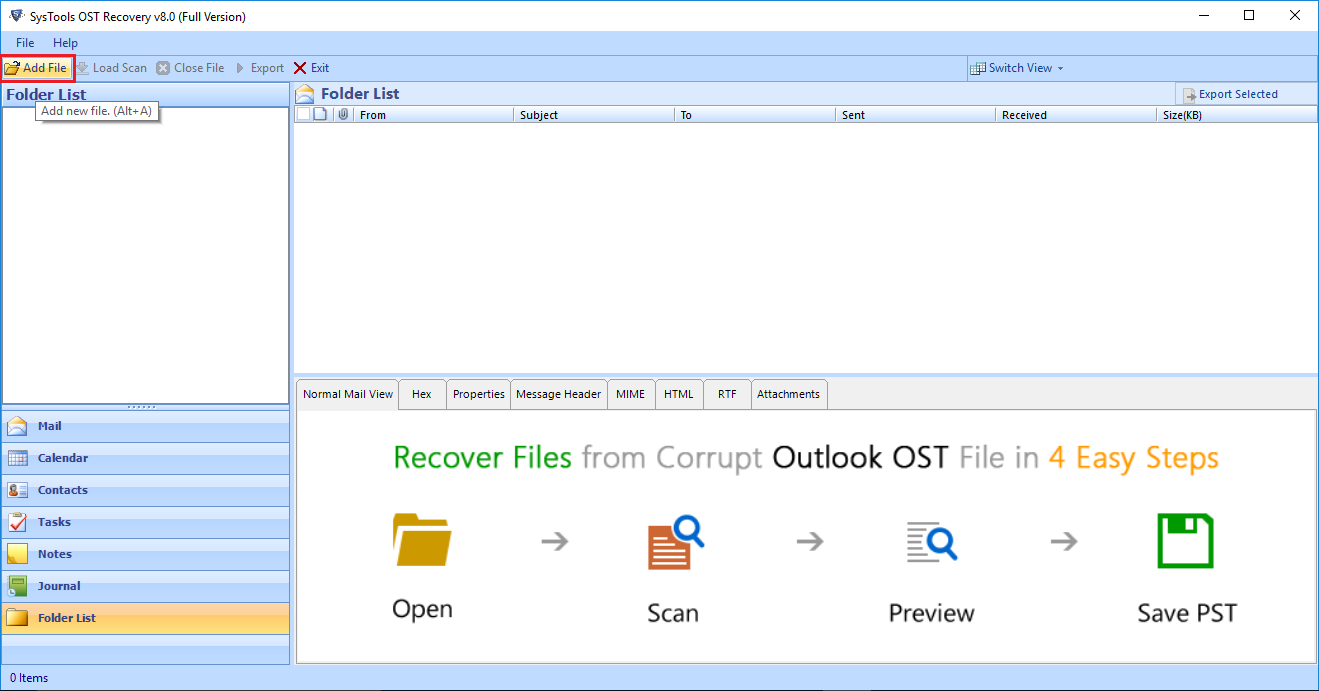
Click on "-" As soon as you click on the Add Files button, "Add File" Window pops up to let you select one of the given options like
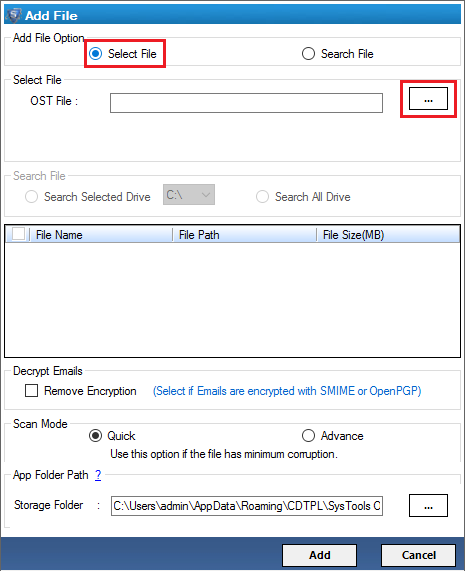
- Select File
- Search File
Click on the "Select File"radio button and browse the OST file click on the “...” button.
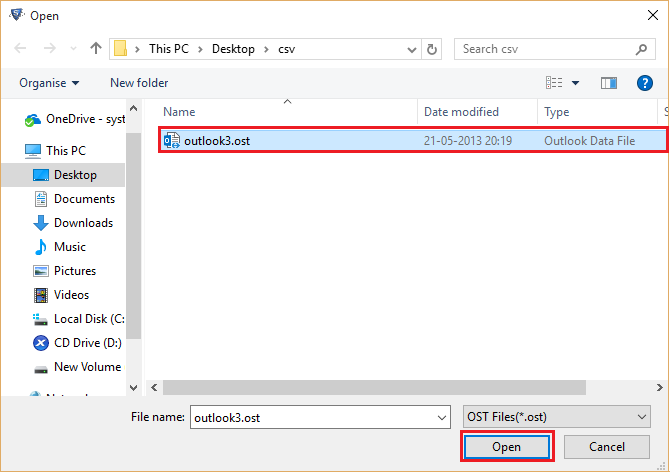
Browse and select the OST file and click on Open button.
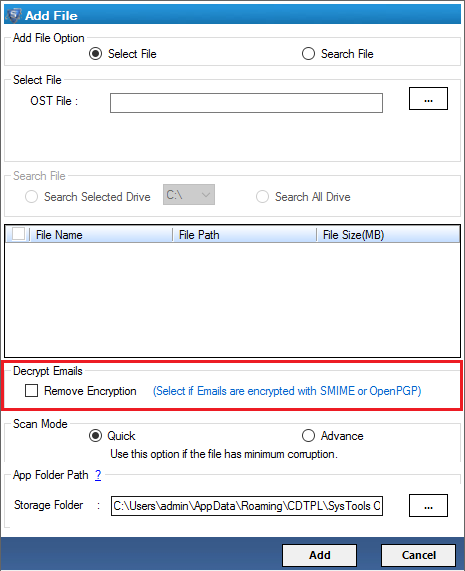
OST PST software supports to remove two Outlook Email Encryptions SMIME and OpenPGP in OST files
- SMIME: This encryption type encrypt Outlook emails using Certificates.
- OpenPGP: This encryption type encrypt Outlook emails using Public and Private Keys.
To remove encryption from Outlook Email Messages in OST file:
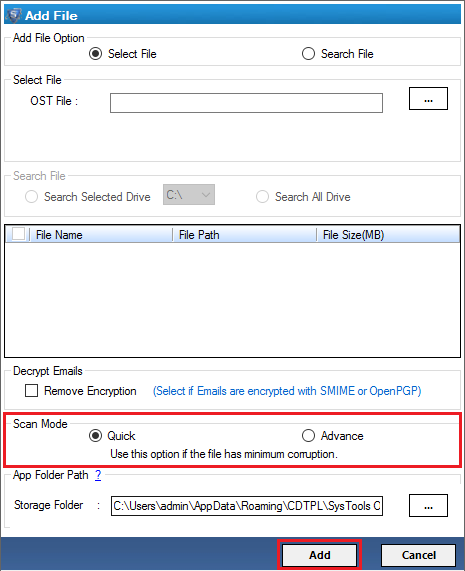
Now you can see the storage path of OST file. The software provides two modes for scanning: Quick and Advance..
- Quick scanning mode: Provides faster recovery of OST files.
- Advance mode:If you are not able to view the data after using quick scan mode or if the OST file is highly corrupted then use the Advance scan mode. As it is designed for deep data recovery task. This Software support Advance Scan on 64 bit OS also. To recover permanently deleted items from OST file, choose Advance scan option.
Once the file is selected, Click on Add button to proceed further.
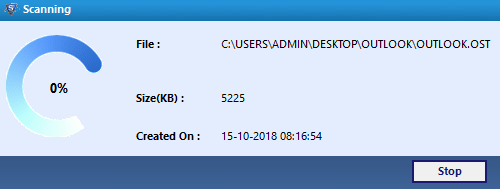
The software will start the scanning process of OST file.
The Left Panel of the software displays existing folders in Source OST files in 2 Fonts.
- Bold: The Folder Name displayed in Bold font contains data in it.
- Unbold:The unbold folders denoted empty folders.
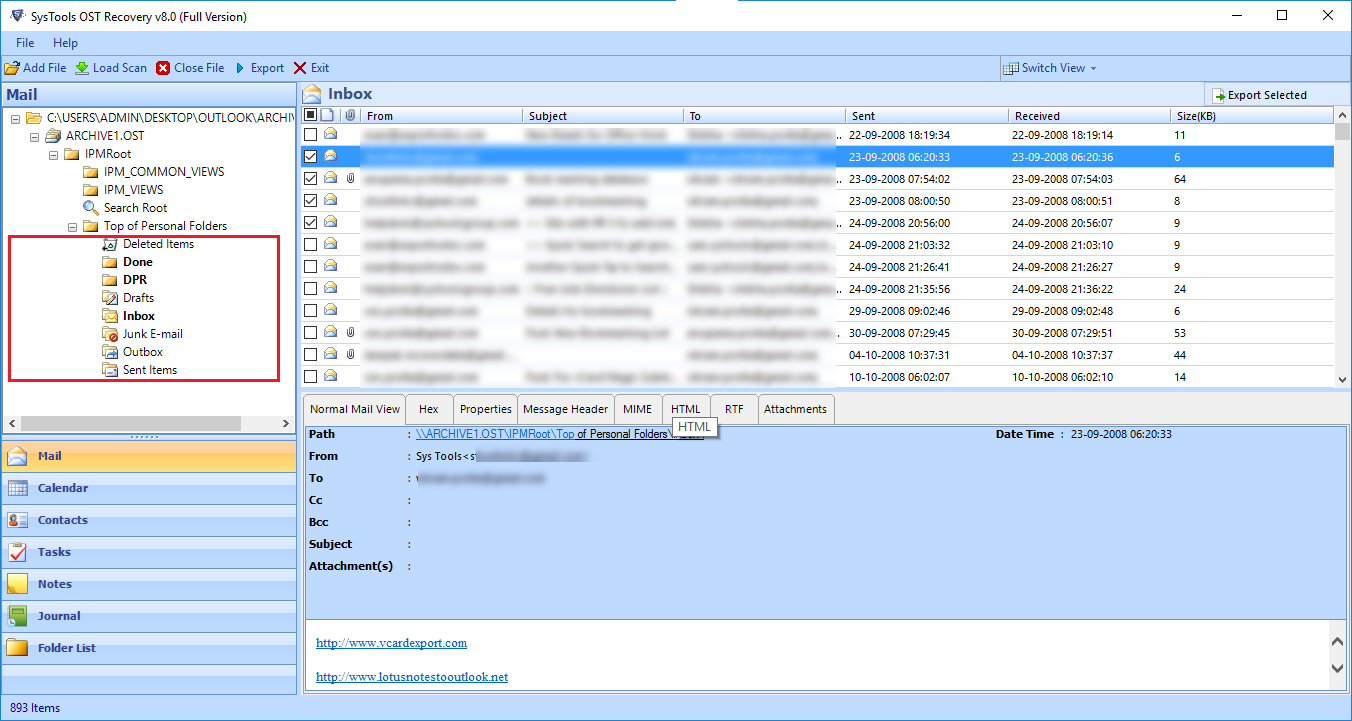
Select the Export Button to migrate all OST file data items together
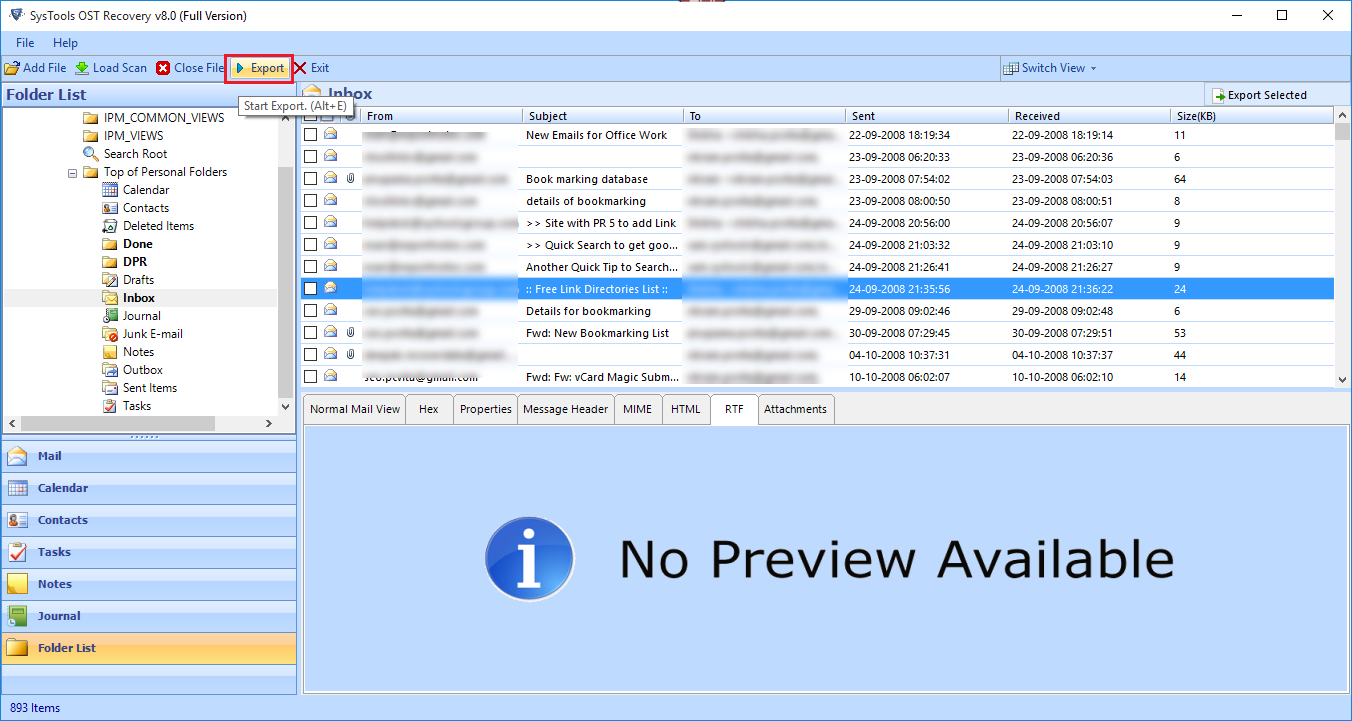
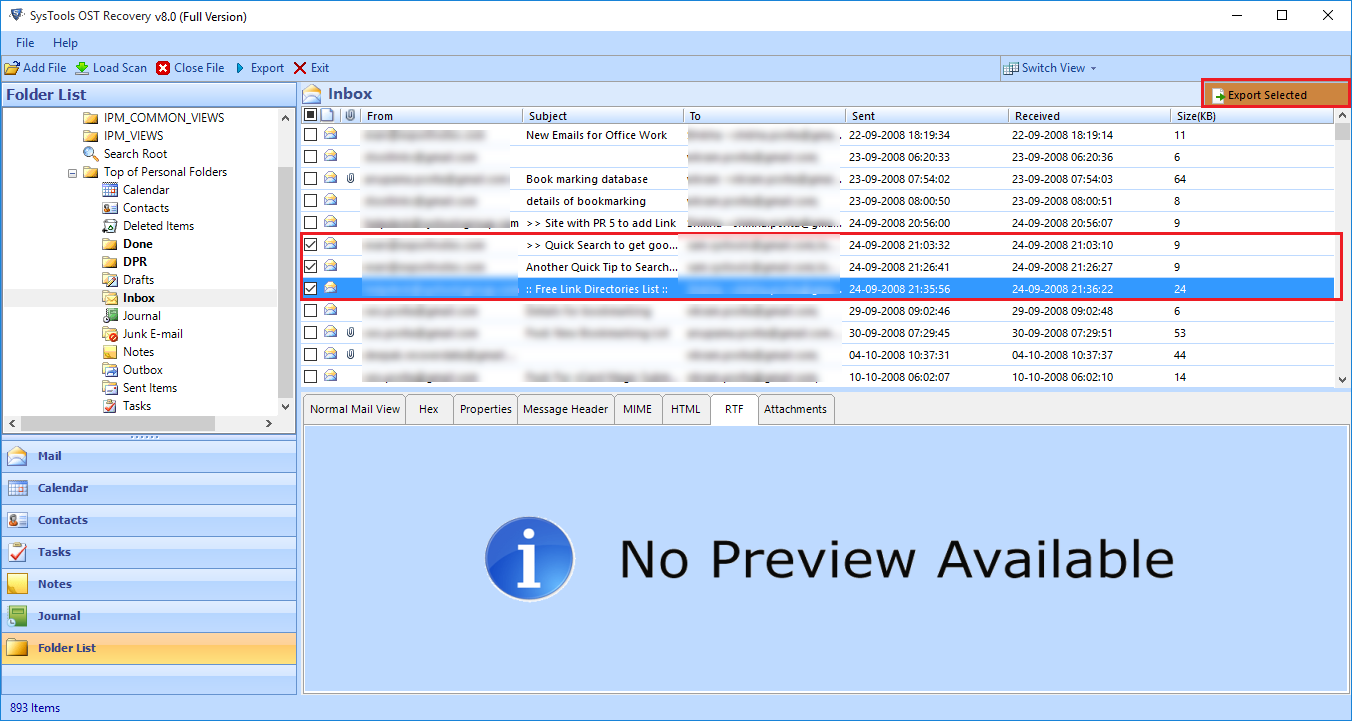
Or select the Export Selected option to migrate only particular selected files in an OST data file item.
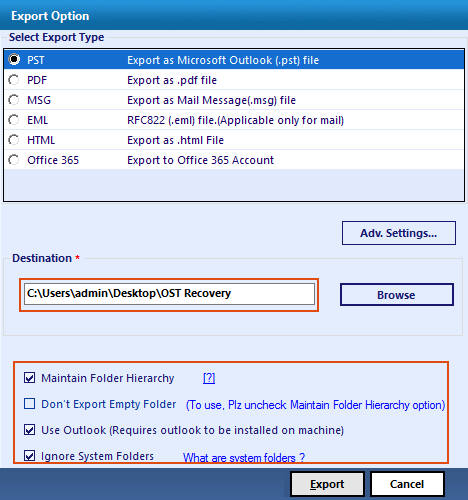
This software gives provides four option to export OST file to PST / EML / MSG / Office 365 / HTML . While the "PST" radio button is selected, Click on the "Advanced setting" button as shown :
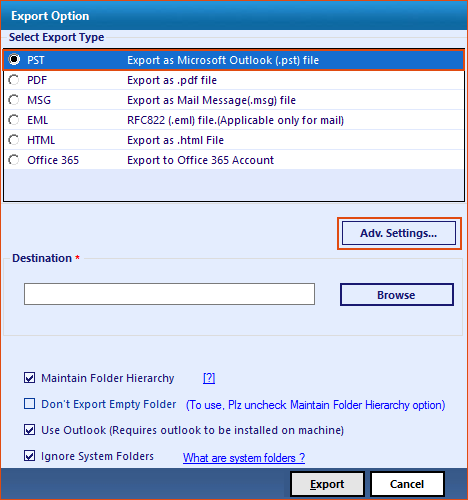
Now, Provide the following settings:
- Split PST:To Split all the PST files using the size that can limit the size of the PST files.
- Date filter option: This allows the user to migrate specific data according to the date from the OST files.
- Categories: As per which we can export the specific components of the OST file such as mails, contacts, calendars, tasks, notes, and journals.
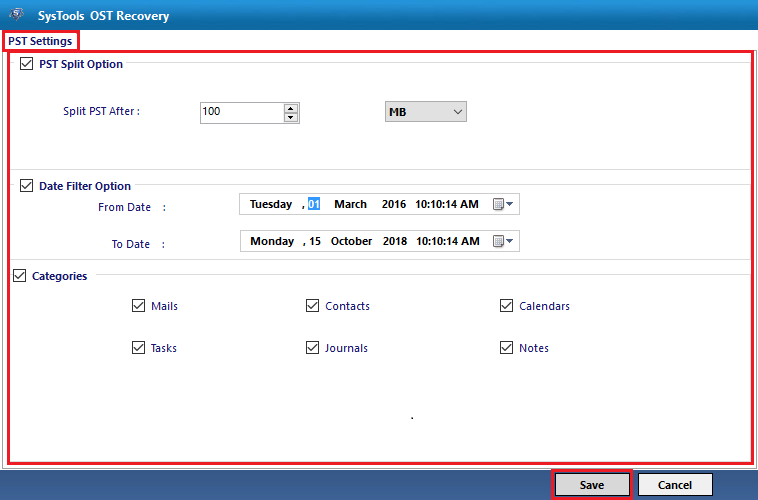
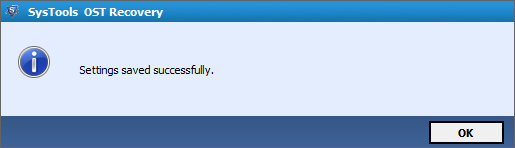
Once the settings have been specified, click on the "save" button. Click OK when a pop-up message: Settings saved successfully' appears.
Check "Maintain Folder Heirarchy" option to have same order of folders (with same name) as in source file in the resultant PST file generated.
Or check "Don't Export Empty Folders" after unchecking "Maintain Folder Heirarchy" to avoid empty folders in resultant PST file generated.
Click on "Export" button to save the previewed items in PST file format.
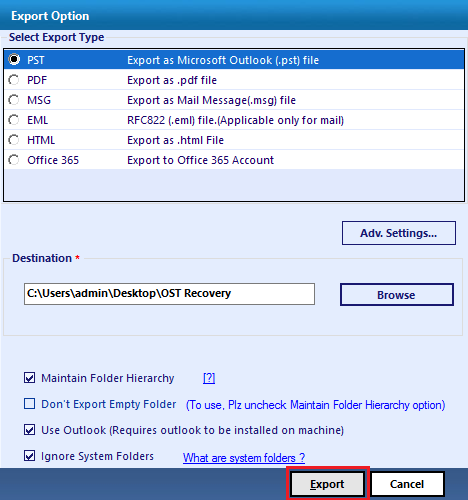
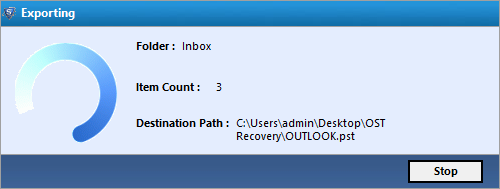
The software will start the Export process now.
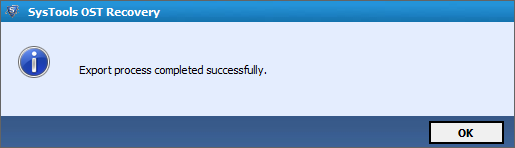
Once the export process is complete, Then the following message would be prompted. Click on "OK".